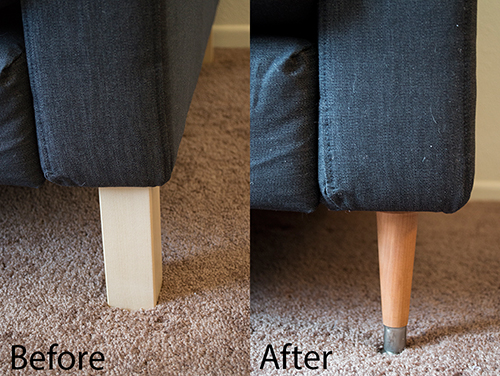
As I mentioned in The Sofa Saga Part 1, I wasn’t loving those legs. They looked cheap and IKEA-y.
Switching up or altering the legs on a Karlstad for a sleeker, sexier, less IKEA look is by no means an original idea. It’s been done here, here, here, here, here, and here, and probably by hundreds of other people. There are even companies that make better looking replacements for IKEA legs such as Pretty Pegs, and Uncle Bob’s Workshop. The latter makes replacement legs specifically for the Karlstad, and I would have seriously considered them if we didn’t need 8. 8 x $9+ = too much for me to spend in addition to already buying the damn couch. Luckily Lowes offers cheaper options. We found these for less than $3 each.
The other supplies we needed included mounting plates (less than $2.00 each). There was a choice between flat and angled, we choose flat (or as it says “straight”)
Stain – love me some golden pecan (I think this little jar was about $7, and we barely made a dent in it)
supplies not pictured: a brush made for stain ($5?), clean cloths (free), masking tape (cheap), and a cardboard box (free). Howard Feed-n-Wax is optional, but I already had some lying around, so I figured, why not?
Step 1: Make sure that your replacement legs are roughly the same size as the originals.
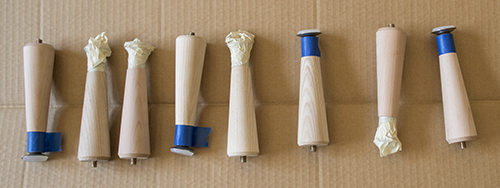
Step 2: Tape over the metal part of the leg. I did the blue ones – that’s why they’re so much prettier.
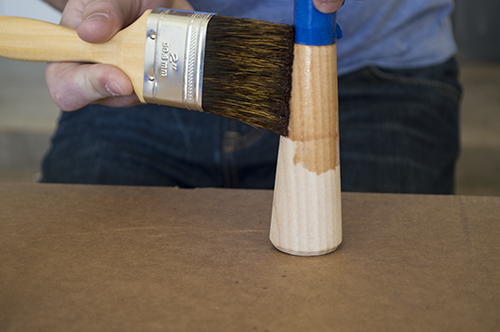
Step 3: Stab the screw end of the leg into a cardboard box so that it’s standing up straight-ish.
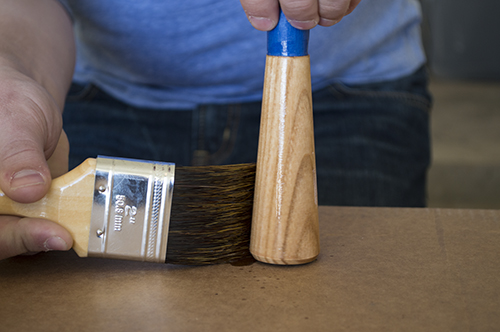
Step 4: Apply stain according to manufacturers instructions. I think we may have actually failed at that because I’m pretty sure we were supposed to be going with the grain, but it all worked out so who cares?
Step 5: Wait desired amount of time, and then wipe off excess stain. Our container said to wait anywhere from 5 to 15 minutes depending on desired color. We waited 5.
Step 6: Wait … again, follow manufacturer instructions. Ours said to wait at least 8 hours for stain to dry.
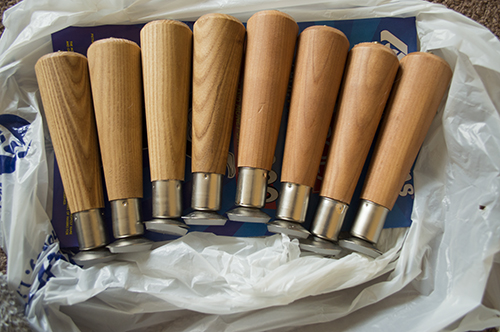
(Optional) Step 7: Apply wax/polish/some type of sealant. With the Howard’s, you soak a clean cloth in the wax, wipe it on, wait 20 minutes, and then buffer it off. Easy peasy, and it smells like oranges.
Step 8: Remove the cushions and flip your couch over. Make a cushion fort if you feel so inclined. Because our sectional is such a beast, we ended up separating it into it’s three sections to make it more manageable.
Step 9: Remove original legs. Just use the same tool you used to screw them in.
Step 10: Remove plastic mounting plate. We used a flat head screw driver, and it was really easy. In these pictures my husband is working from the bottom, but I found it easier to work from the corner with the hole in it. There are no staples up there, so the screwdriver just slides right in.
TA-DA!
Step 11: Attach metal mounting plates with given screws. My husband did all of these, but I believe he tried to line the middle up over the original screw hole.
Step 12: Screw in much better looking legs
Step 13: Flip that thing back over, reassemble if necessary, throw the cushions back on, and admire your new and improved couch.
Side note: We can keep the dogs off the couch, but we apparently can’t keep the dog hair off the couch. Dog hair dominates our lives!







Pingback: The Sofa Saga Part 1 | Temporary Digs
OMG. It makes a huge difference! Great job, guys!