I’m moving off of wordpress.com and over to my own hosted site: temporary-digs.com

Still working out a few kinks, but I thought I’d keep you in the know since that was my big blog project for the day.

I don’t know if I can get this site to auto redirect to the new one, so bookmark the new one just in case if you want to stay up to date.

Edit: I’m not going to pay to redirect this blog since I just started it. I will leave this message up for a week, and then delete the wordpress.com blog. Please bookmark or subscribe to temporary-digs.com

DIY coffee table inspiration

I am determined to make rather than buy a coffee table for our living room. I don’t really like anything that I’m seeing in stores (style or price), and honestly I think it would be much more fun to build my own. We don’t have a proper wood shop or anything, but I think we’ve got enough tools for what I have in mind. These are the current contenders:

wirecoffeetable

This is by far the easiest option. I’d replace the acrylic sheets with a custom cut piece of glass or wood, and maybe make it longer by adding another V shaped base. [instructions]

hairpin

Next up is a pretty easy option as well. Take a nice piece of wood and slap some hairpin legs on it. So simple and so perfect. [instructions]

herringbonehairpin

If I wanted to get a bit fancier, I could do a herringbone pattern for the table top. Oh how I love me some herringbone – though I’m not entirely sure that I have the tools and/or skills to pull it off. [instructions]

cb2herringbone

I could also do something like this. Same table top idea, different legs. This one is actually from CB2, but I think I could make it as long as I could get the  herringbone top figured out. Legs like that can’t be too hard to come by or make, right?

The next two are IKEA hacks. I’ll be close to an IKEA next month, so I could conceivably pick up any needed parts.

lerberg

Easy option – this one is just a board mounted on some Lerberg trestles.  [source]

concrete

Finally, and this one may currently be my favorite, is a concrete topped coffee table. I’ve never made a mold for or poured concrete before, but my best friend has, so hopefully she could talk me through it if we decide on this one. The base is an IKEA Klubbo. [instructions]

I probably won’t get around to starting on this for at least another month, so I may end up finding even more options by then, but what’s your favorite of the one’s that I’m currently considering?

Bathroom Monochromatic Mini Mood Board and Plans

I had grand plans of creating an elaborate bathroom mood board, but I’m feeling pretty sick this morning, so you’re getting this instead.

Bathroom

I already own the shower curtain, but that’s just about the only attractive thing in my bathroom at the moment. I’m going for a nautical, but not over the top, theme. I think that these Ikat link bath towels would look great hanging next to my shower curtain. The Squid vs. The Whale print is going to end up in my house somewhere, so why not hang it over the toilet, right? I want to add more color to the bathroom too. The shower curtain is actually a little greener than it looks in the picture, so I’m on the hunt for the perfect light sea foam green bath mat (which is surprisingly hard to find), and I’ve got three cheapo white metal lanterns that I’m thinking about spray painting (maybe red or yellow) and hanging in the window.  I also really have my heart set on making a fake porthole and having something peeking into my bathroom through it, though I haven’t really worked out the logistics of that one yet. That covers about 2/3rds of the bathroom, I have no idea what I’m going to do with the rest of it. I could probably start by cleaning and organizing – that makes everything look better.

The Sofa Saga Part 2 (how to replace karlstad legs)

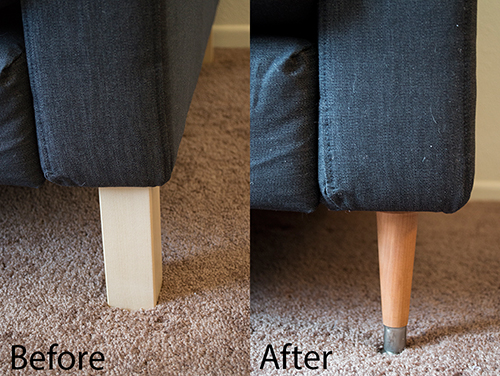
As I mentioned in The Sofa Saga Part 1, I wasn’t loving those legs. They looked cheap and IKEA-y.

origlegs

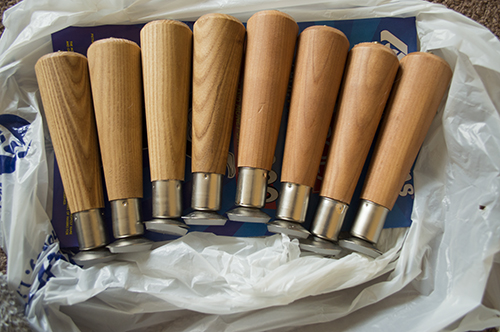
Switching up or altering the legs on a Karlstad for a sleeker, sexier, less IKEA look is by no means an original idea.  It’s been done here, here, here, here, here, and here, and probably by hundreds of other people. There are even companies that make better looking replacements for IKEA legs such as Pretty Pegs, and Uncle Bob’s Workshop. The latter makes replacement legs specifically for the Karlstad, and I would have seriously considered them if we didn’t need 8. 8 x $9+ = too much for me to spend in addition to already buying the damn couch. Luckily Lowes offers cheaper options. We found these for less than $3 each.

plainleg

The other supplies we needed included mounting plates (less than $2.00 each). There was a choice between flat and angled, we choose flat (or as it says “straight”)

top plate

Stain – love me some golden pecan (I think this little jar was about $7, and we barely made a dent in it)

stain

supplies not pictured: a brush made for stain ($5?), clean cloths (free), masking tape (cheap), and a cardboard box (free). Howard Feed-n-Wax is optional, but I already had some lying around, so I figured, why not?

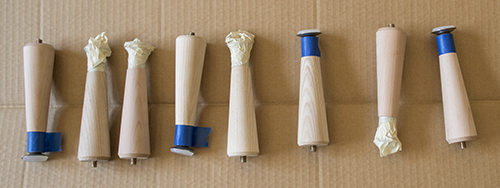
Step 1: Make sure that your replacement legs are roughly the same size as the originals.

sidebyside

Step 2: Tape over the metal part of the leg. I did the blue ones – that’s why they’re so much prettier.

taped legs

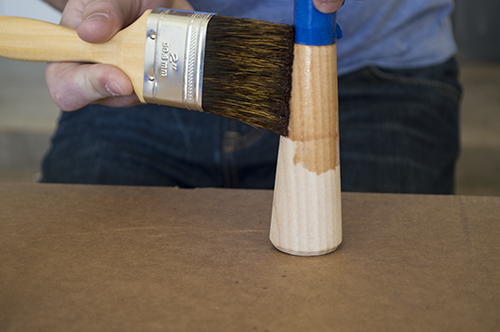
Step 3: Stab the screw end of the leg into a cardboard box so that it’s standing up straight-ish.

stucklegs

Step 4: Apply stain according to manufacturers instructions. I think we may have actually failed at that because I’m pretty sure we were supposed to be going with the grain, but it all worked out so who cares?

staining1 staining

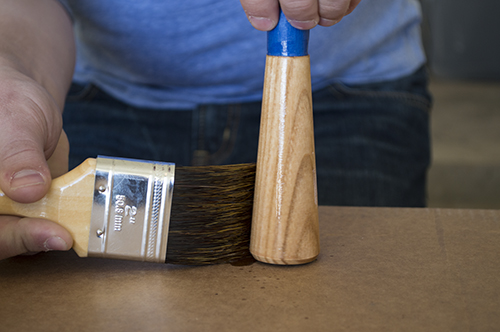
Step 5: Wait desired amount of time, and then wipe off excess stain. Our container said to wait anywhere from 5 to 15 minutes depending on desired color. We waited 5.

wiping stain

Step 6: Wait … again, follow manufacturer instructions. Ours said to wait at least 8 hours for stain to dry.

(Optional) Step 7: Apply wax/polish/some type of sealant. With the Howard’s, you soak a clean cloth in the wax, wipe it on, wait 20 minutes, and then buffer it off. Easy peasy, and it smells like oranges.

howardpolished

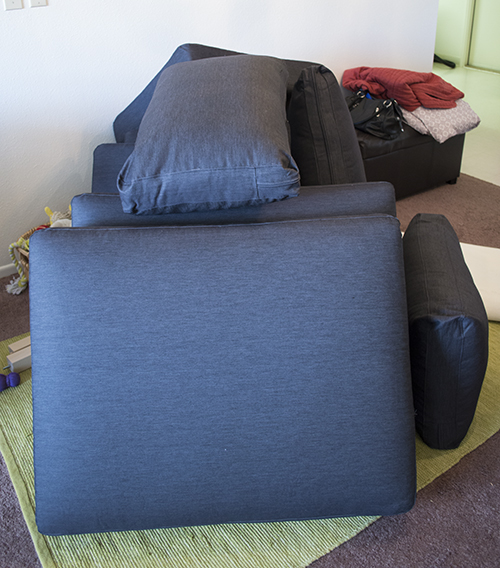
Step 8: Remove the cushions and flip your couch over. Make a cushion fort if you feel so inclined. Because our sectional is such a beast, we ended up separating it into it’s three sections to make it more manageable.pillow fort

Step 9: Remove original legs. Just use the same tool you used to screw them in.

removingleg

Step 10: Remove plastic mounting plate. We used a flat head screw driver, and it was really easy. In these pictures my husband is working from the bottom, but I found it easier to work from the corner with the hole in it. There are no staples up there, so the screwdriver just slides right in.

plasticremoval1 plasticremoval2

TA-DA!

removedplastic

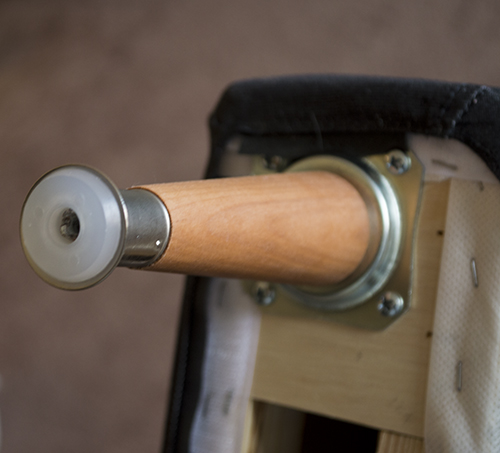
Step 11: Attach metal mounting plates with given screws. My husband did all of these, but I believe he tried to line the middle up over the original screw hole.

screwingplates mountedplate

Step 12: Screw in much better looking legs

mountedleg

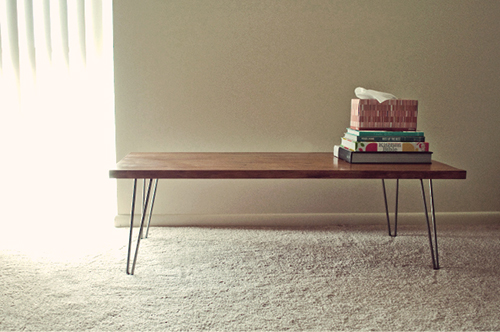
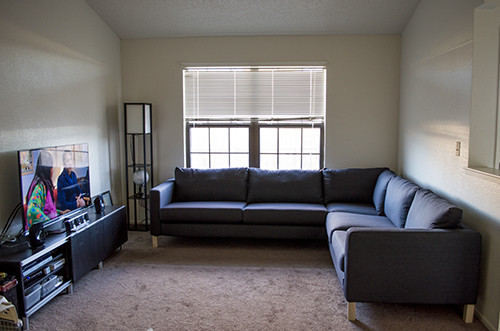
Step 13: Flip that thing back over, reassemble if necessary, throw the cushions back on, and admire your new and improved couch.

couchnewlegs

b&a

Side note: We can keep the dogs off the couch, but we apparently can’t keep the dog hair off the couch. Dog hair dominates our lives!

The Sofa Saga Part 1

We tossed our old couch before we PCS’d back in June, because to put it nicely, the thing was a piece of shit. We bought it new for about $300, which probably tells you about how well made it was. We got a good 2 years use out of it, but by the time we said buh-bye it was covered in stains, and one of the springs had popped and would poke you in the butt whenever you sat down.

Once we finally arrived at our new duty station (almost 7 months after we departed our old one), my first house related priority was to find a new couch. I had a price range in mind (originally $700, but I bumped it up to $1000), and a general idea of what I wanted (large sectional, not overstuffed, preferably with a mid century modern vibe, and that would actually fit where we needed it), but I was having a really difficult time finding something that met all of those criteria. Mostly because sectionals are freaking expensive! There was one that I knew I liked, the Karlstad from IKEA, but we’re about 8 hours from the nearest IKEA, so that didn’t seem like a viable option.

karlstad stock

But then something funny happened, I spent a month using an air mattress as living room furniture, and my search for a suitable sofa continued to disappoint, so I began to reconsider the Karlstad. We could drive to Denver or Dallas, but we’d have to factor in not only the cost of the couch, but also the cost of gas for a not very fuel efficient truck, plus a nights stay in a hotel. That or we’d have to suck it up and pay $350 for shipping. After a little mathing, we decided that a voyage to the great Swedish super store was going to cost us just as much money, and way more effort than just ordering it online. So we did. We paid $350 for shipping. I have never paid that much for shipping before, and I probably never will again. But to be totally honest, even with shipping costs, this sofa was a great deal. I do have some complaints to make about IKEA’s shipping department (but not the delivery guys, they were great), but I’ll save that rant for another day.

Our IKEA delivery finally arrived on Feb 26th (after ordering it on the 6th – but I said I wasn’t going to get into that). It arrived about 10 minutes after my husband left for work. I promised him that I wouldn’t try to assemble it without him because 1. I’ve had a recent streak of bad luck when it comes to assembling and or not breaking things, and 2. I’m tiny and clumsy and would most likely end up in the emergency room. But I only promised that I wouldn’t assemble it – I didn’t say anything about unpacking and roughly arranging it. This is what our place looked like when he got home for lunch that day. (I recovered everything in plastic to keep the dogs away). Once he headed back to work, I took a very long nap, because couch unpacking is apparently quite exhausting.

newcouch

When he got home from work that night we assembled the couch. There are no assembly pictures because, well, I was kind of too busy assembling.  I did however get pictures of the finished project the following day.

couch

(Yes that’s the mindy project on TV.)

couch2

I LOVE this couch. It’s the perfect size, and it’s surprisingly comfortable. The only thing I’m not in love with are those cheapo looking IKEA legs, but as of this writing we’ve already taken care of that. We stole the ideas of many a genius IKEA hacker, and swapped out those blocky legs for something a little more sexy. Details to come in The Sofa Saga Part 2

Blank Slate

I’m a big fan of before and afters, so I figured I’d start out this blog right with the ultimate Before. To get a general idea of how all the pieces fit together this is the layout of our place.Scanned Document

These pictures were taken the night we got our keys. This is our ginormous living room. I’m still trying to figure out how they got the carpet lines like that.

living room

View from the living room of our tiny dining room, and part of the kitchen.

dining room

Most of the kitchen. It’s actually bigger than it looks in this picture.

kitchen

Front Hall

hall

Corner of the guest room, because apparently I wasn’t paying much attention

guest

Back Hall

hall2

Shower (taken sitting on the counter)

bathroom2

Rest of the bathroom (taken standing in the shower)

bathroom1

Master Bedroom taken from the door way

master1

Master Bedroom moving to the left

master2

Master Bedroom view of door and walk in closet

master3

I forgot to get before pictures of the utility/laundry/storage room, garage, backyard and general outside of the house.

These pictures were taken on January 26th, and we’ve made plenty of progress since then, but I still have so many more plans. I’ll be posting pictures of some of the projects that I’ve already completed, and we’ve got more projects in the works for this weekend. I’m hoping that with a decent amount of time and effort, I’ll be able to turn this basic military housing into something resembling a real home.